MacOS easy to capture a screen shot (an image of your computer desktop or an active window). Here's a summary of all the methods you can use to capture your screen using Mac OS X.
I. Using MacOS
- To capture the entire desktop, press Command + Shift + 3. The screen shot will be automatically saved as a PNG file on your desktop.
- To copy the entire desktop, press Command-Control + Shift + 3. The screen shot will be placed on your clipboard for you to paste into another program.
- To capture a portion of the desktop, press Command + Shift + 4. A cross-hair cursor will appear and you can click and drag to select the area you wish to capture. When you release the mouse button, the screen shot will be automatically saved as a PNG file on your desktop. (The file is saved as PDF in Mac OS 10.3 and earlier.)
- To capture a specific application window, press Command + Shift +4, then press the Spacebar. The cursor will change to a camera, and you can move it around the screen. As you move the cursor over an application window, the window will be highlighted. The entire window does not need to be visible for you to capture it. When you have the cursor over a window you want to capture, just click the mouse button and the screen shot will be saved as a PNG file on your desktop. (MacOS X >= 10.5)
Open Grab: Application > Utility > Grab
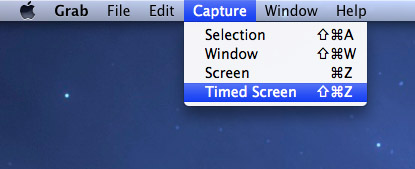
- Selection capture: Command + Shift + A
- Window capture: Command + Shift + W
- Full screen capture: Command+ Z
- Set time capture: Command + Shift + Z
If you want to change the image capture extension from .png to other ext (.jpg, .jpge...) you shout use Terminal
defaults write com.apple.screencapture type [your_image_extension]
killall SystemUIServer
Example:
defaults write com.apple.screencapture type jpg
killall SystemUIServer
Next time you capture your screen, the file will saving with new extension!

